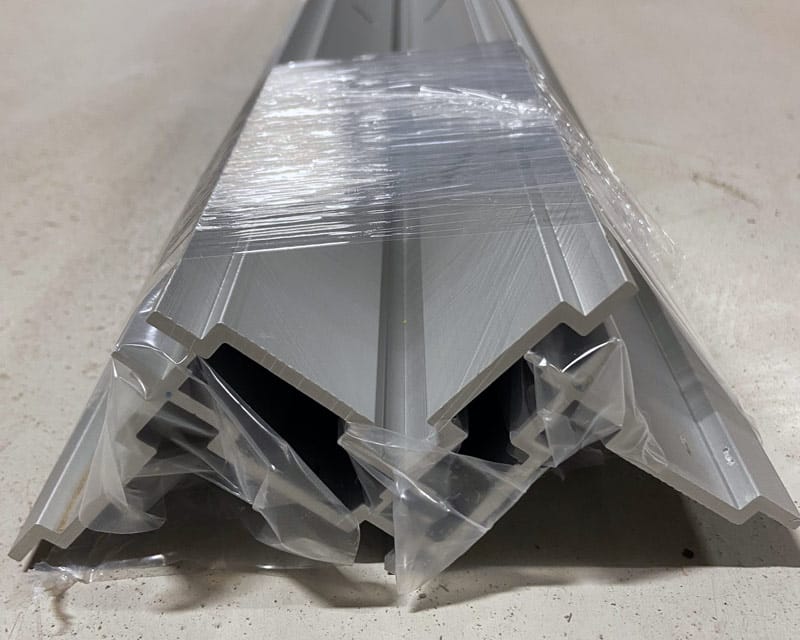
Clear Anodized Angles and Flat Bars: A Clean, Durable Solution for Modern Applications

How clear anodized aluminum angles and flat bars deliver clean lines, lasting durability, and consistent finishes for modern architectural applications.

When a project calls for both performance and a refined appearance, material selection becomes critical. In many architectural and fabrication applications, aluminum angles and flat bars serve as essential components for protection, finishing, and clean visual transitions. Choosing the right finish can elevate these simple profiles into long lasting, visually consistent design elements.

Clear anodized aluminum angles and flat bars offer a practical and reliable solution for projects where durability and appearance matter equally. From commercial interiors to residential builds, these products provide a clean, uniform look while standing up to daily wear.

What Are Clear Anodized Angles and Flat Bars?

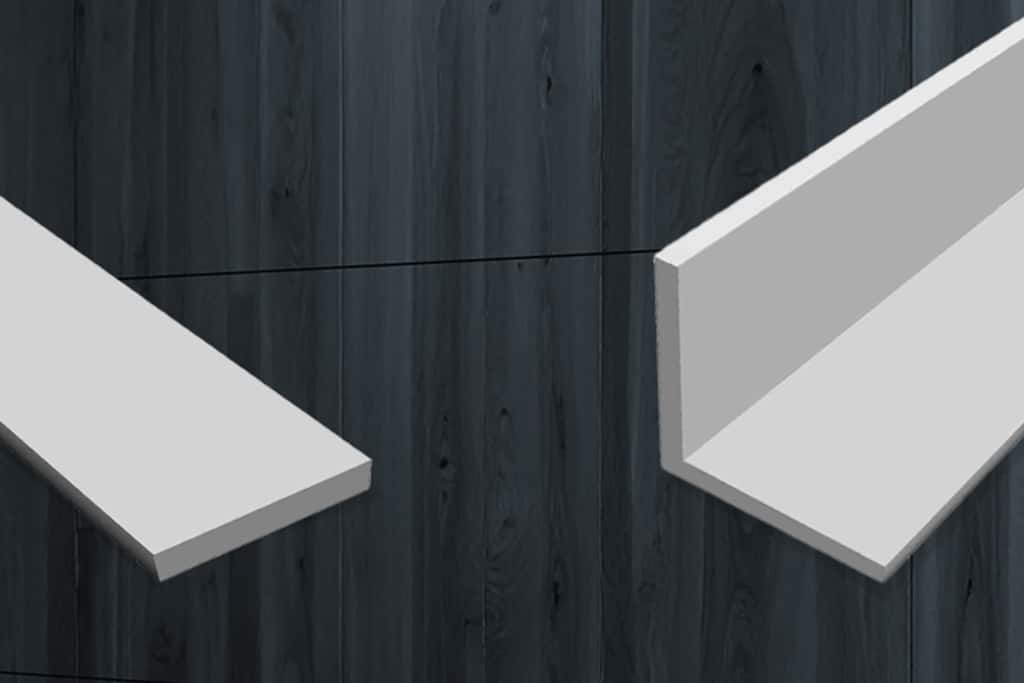
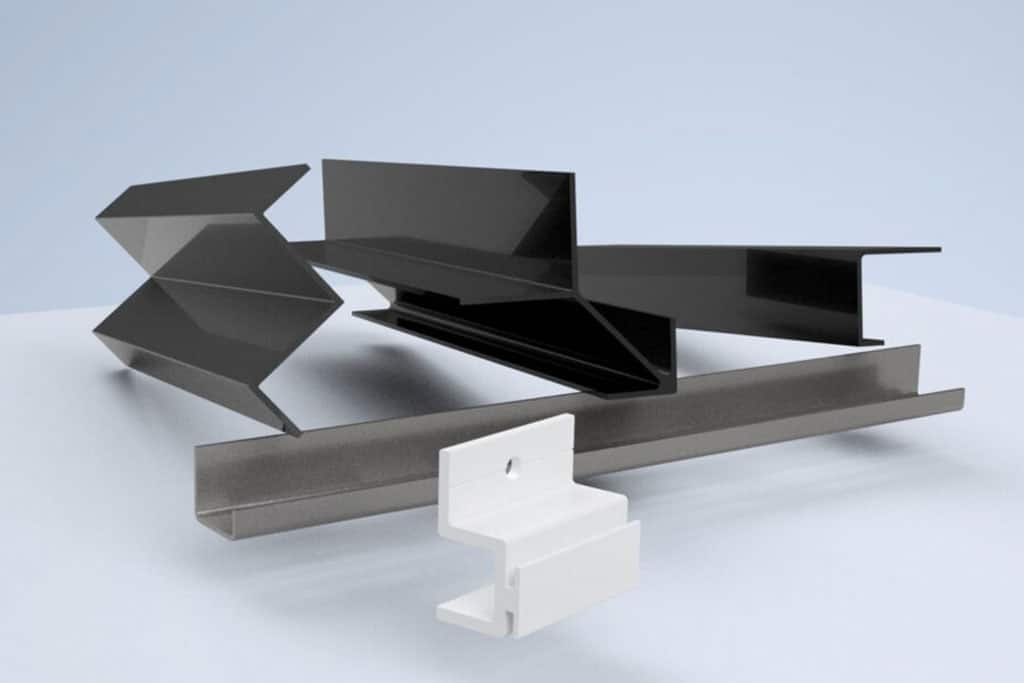
Aluminum angles and flat bars are versatile profiles used across a wide range of applications. Angles are commonly used for edge protection, framing, and transitions. Flat bars are often used for trim, backing, spacing, or surface protection.

When these profiles are clear anodized, they undergo an electrochemical process that strengthens the natural oxide layer on the aluminum surface. This creates a harder, more durable finish that is integrated into the material itself rather than applied on top.

The result is a smooth, satin appearance that resists corrosion, scratches, and fading over time.

Why Choose Clear Anodized Aluminum?

Clear anodized angles and flat bars are often selected for their balance of aesthetics and performance. The finish provides a consistent, high quality appearance that works well in both modern and traditional environments.

Unlike raw aluminum, clear anodized material is less prone to visible handling marks, oxidation, or surface inconsistencies. It maintains its appearance over time, even in high traffic or exposed conditions.

Key benefits include:

  • Enhanced corrosion resistance for interior and exterior use
  • Improved surface hardness compared to untreated aluminum
  • A uniform, professional appearance with minimal variation
  • Low maintenance with no need for painting or coating

This makes clear anodized profiles especially well suited for applications where both durability and visual consistency are important.

Common Applications

Clear anodized angles and flat bars are used in a variety of settings, including:

  • Edge protection for walls, panels, and casework
  • Trim and finishing details in commercial interiors
  • Clean transitions between materials and surfaces
  • Architectural accents and design elements
  • Backing or spacing components in fabrication projects

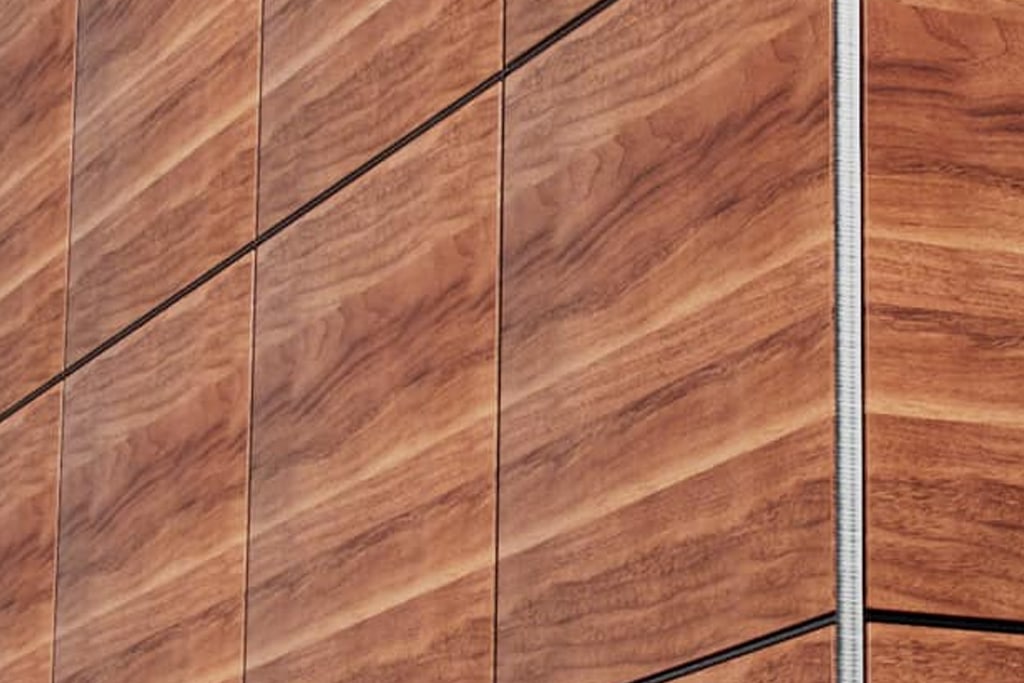
Their clean finish allows them to blend seamlessly into a space or complement other materials such as glass, wood, or stone.

Clear Anodized vs Mill Finish

While both clear anodized and mill finish aluminum angles and flat bars serve similar functional purposes, the difference lies in their surface characteristics and long term performance.

Mill finish aluminum is the raw, untreated material as it comes from the manufacturing process. It may show natural variations, surface lines, or handling marks. Over time, it can oxidize and develop a dull or inconsistent appearance, especially in exposed environments.

Clear anodized aluminum, on the other hand, has a controlled and finished surface. The anodizing process enhances durability while providing a more uniform look. It is better suited for visible applications where appearance matters, as well as for environments where corrosion resistance is a concern.

For projects where the material will be seen and expected to maintain its look, clear anodizing is typically the preferred choice.

A Reliable Choice for Long Term Performance

Clear anodized angles and flat bars offer a straightforward solution for projects that demand both function and finish. Their ability to resist wear while maintaining a clean, consistent appearance makes them a dependable option across a wide range of applications.

Whether used for protection, finishing, or design, these profiles provide lasting value with minimal upkeep. For architects, designers, and fabricators, clear anodized aluminum continues to be a practical and proven choice.

Interior Panel Systems: Flexible Wall Solutions for Modern Architectural Design

How modern interior panel systems support mixed materials, consistent reveals, and adaptable architectural wall design.

Interior panel systems have become a popular solution for architects and designers looking to create clean, modern wall surfaces that combine visual impact with efficient installation. These systems allow wall panels to be mounted using concealed clips or brackets, creating a structured layout with consistent spacing and hidden hardware.

Unlike traditional wall finishes that rely on adhesives or exposed fasteners, panel systems provide a modular framework that allows panels to be installed, removed, and replaced when needed. This approach supports a wide range of materials and panel thicknesses while maintaining a precise architectural appearance.

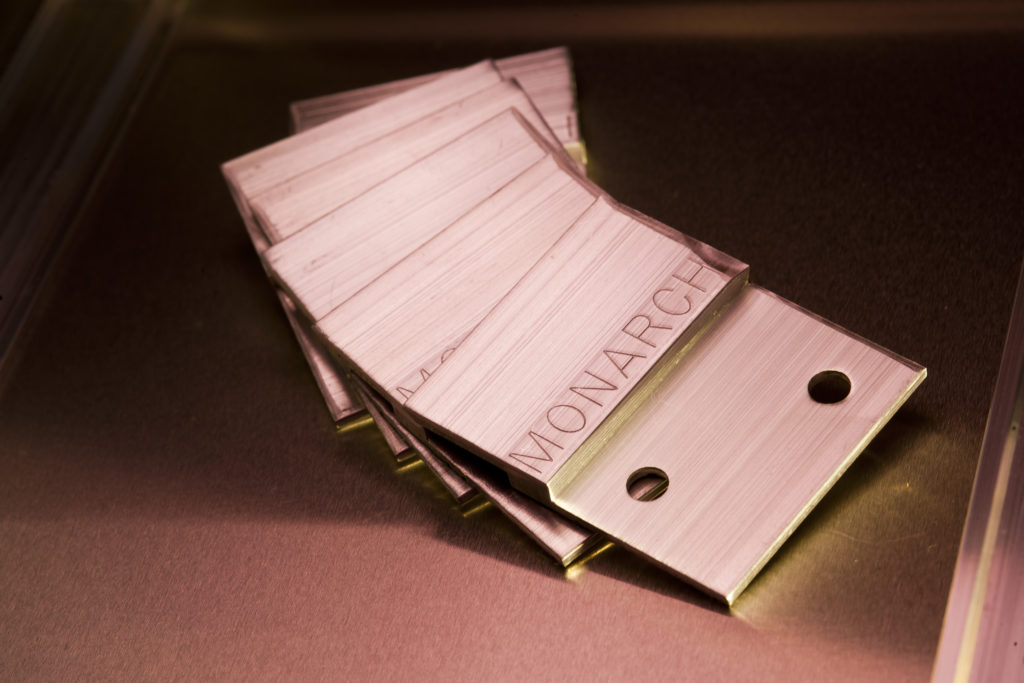
At Monarch Metal, interior panel systems are commonly used with architectural trims, mounting clips, and reveal systems that help designers create feature walls with consistent alignment and professional finishes.

What Are Interior Panel Systems?

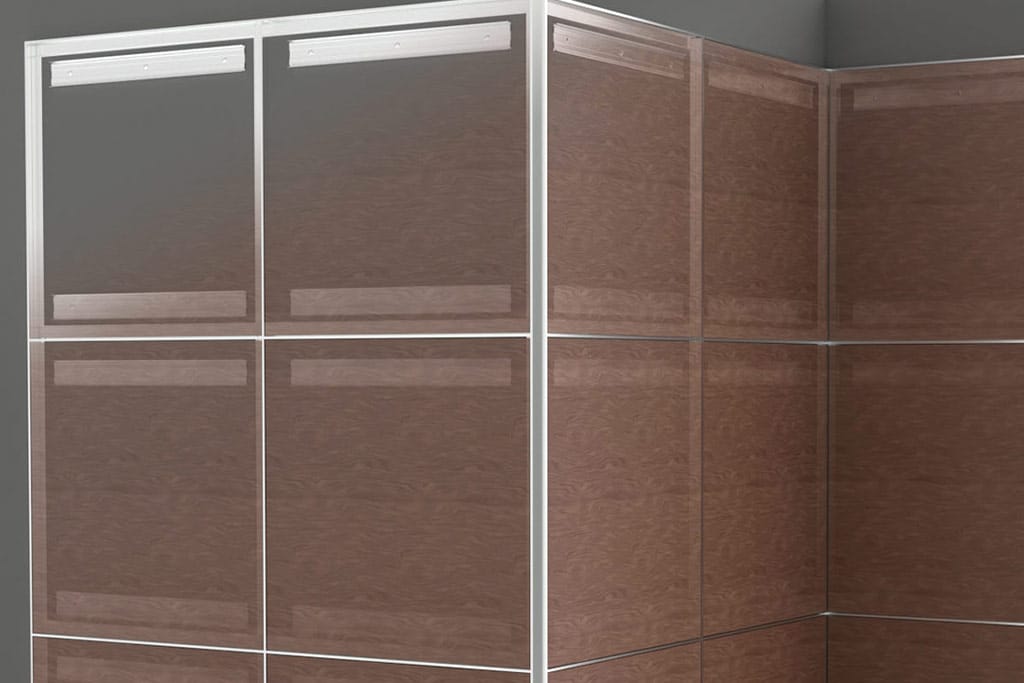
Interior panel systems are mounting solutions designed to support decorative or architectural wall panels. These systems typically use aluminum trims, clips, or brackets that attach to the wall structure and support individual panels.

The panels are installed into this framework with consistent spacing that creates visible reveals between panels. Because the mounting hardware is concealed behind the panels, the finished wall surface appears clean and uninterrupted.

Interior panel systems are often used with materials such as:

  • Wood veneer panels
  • Phenolic panels
  • Laminate panels
  • Glass panels
  • Acrylic panels

By separating the mounting system from the panel material itself, these systems allow designers and fabricators to select materials that best fit the aesthetic and performance requirements of a project.

Adapting Panel Systems for Varying Panel Thickness

Many architectural wall designs include panels of different thicknesses. For example, a feature wall may combine thin laminate panels with thicker wood veneer or phenolic panels.

Adaptor clips are commonly used within interior panel systems to accommodate these variations in panel depth. These clips allow thinner panels to be installed within a system designed for thicker materials, ensuring that all panels align properly with the surrounding trims and reveals.

This flexibility allows designers to maintain a consistent reveal pattern across the entire wall, even when multiple materials or panel thicknesses are used in the same installation.

The result is a cohesive wall system that maintains visual consistency while supporting a wider range of panel materials.

Integrating Glass and Acrylic Panels

Modern interior spaces frequently incorporate glass or acrylic panels as part of decorative wall systems. These materials add reflective surfaces, color accents, or backlit design elements that enhance the overall architectural environment.

In some cases, mechanical fasteners may not be desirable for glass or acrylic panels. High-strength mounting tapes can be used as an alternative attachment method, allowing panels to be bonded securely to clips or brackets within the panel system.

When used correctly, this approach allows glass panels to integrate seamlessly into a larger wall system while maintaining the same reveal spacing and trim structure as surrounding panels.

This capability allows designers to combine transparent, reflective, and opaque materials within the same architectural wall feature.

Mixed Media Wall Design

One of the most notable trends in modern interiors is the use of mixed media wall systems. Rather than using a single material across an entire wall surface, designers combine multiple materials to create depth and contrast.

Examples of mixed media panel systems include:

  • Wood panels paired with aluminum reveals
  • Glass accent panels within composite wall systems
  • Acrylic panels combined with laminate panels
  • Metal panels integrated with decorative architectural trims

Interior panel systems provide the structural framework that allows these combinations to be installed cleanly and consistently.

Why Interior Panel Systems Are Widely Used

Interior panel systems offer several advantages compared with traditional wall finishing methods:

  • Concealed mounting hardware
  • Consistent panel alignment and spacing
  • Support for multiple panel materials
  • Adaptability for varying panel thicknesses
  • Serviceability and panel replacement when needed

Because these systems provide both structural support and aesthetic control, they are widely used in commercial interiors, corporate offices, hospitality spaces, retail environments, and architectural feature walls.

As interior design continues to evolve toward layered materials and modular construction, interior panel systems provide a practical solution that balances flexibility, precision, and long-term durability.

Adhesive Z-Clips: The Best DIY Mounting Solution for Panels, Art, and Small Projects

Discover how Monarch Metal’s peel-and-stick Z-clip kits make wall mounting faster, cleaner, and more professional, without power tools or guesswork.

If you’re a DIYer or prosumer searching for an easy and reliable way to hang panels, signs, artwork, or lightweight décor, Monarch Metal’s adhesive-backed Z-clip kits are a simple and professional solution. These peel-and-stick kits use 3M VHB adhesive to eliminate the need for drilling into your piece, allowing for clean, floating installations with no visible fasteners. Whether you’re mounting acoustic boards in a home studio, back painted glass, a mirror or custom signage in a workspace, these clips give you a sleek result with minimal effort.

Each kit in Monarch’s adhesive Z-clip line comes pre-packed with matching clip and rail lengths, offered in four convenient sizes to suit a range of small to medium mounting projects. You can choose from 12″, 24″, 36”, or 48″ options, depending on the size of your display. Every kit includes both the wall rail and the adhesive-backed clip, along with all the necessary mounting screws for the attachment of the wall rail to the substrate. The standard 3/8″ lift-off and .293″ projection allow for secure engagement while maintaining a low profile, perfect for tighter spaces where clean design matters.

What makes these kits ideal for DIYers is the simple peel-and-stick setup. You apply the adhesive clip to the back of your object, mount the included wall rail using screws, and then lower the piece onto the wall rail. The traditional Z-clip profile creates a strong mechanical hold through vertical engagement, no snapping or pushing required. It’s the same proven system used in professional installations, now streamlined for smaller-scale personal projects.

Whether you’re building a gallery wall, hanging signage, or mounting decorative panels, Monarch’s adhesive Z-clip kits make the job easier and cleaner. With four kit lengths to choose from and all necessary hardware included, there’s no need for cutting,measuring, or sourcing extra parts. It’s a modern, low-profile mounting solution that delivers pro results, no power tools or contractors needed.

You can also use our dual adhesive-backed MFTAPE Z-Clip if you need more bonding strength. In any case, we have you covered.

Mill Finish vs. Clear Anodized Aluminum Slatwall: Which Is Right for Your Space?

Choosing the Right Aluminum Slatwall Finish: Mill Finish vs. Clear Anodized

When selecting aluminum slatwall for your space—whether it’s a retail display, garage storage wall, or workshop setup—the finish of the slatwall plays a big role in both function and appearance. Two of the most common finish options are mill finish and clear anodized, each offering unique benefits depending on your needs and environment. Understanding the differences between the two can help you make a smarter investment and avoid unnecessary costs or maintenance down the road.

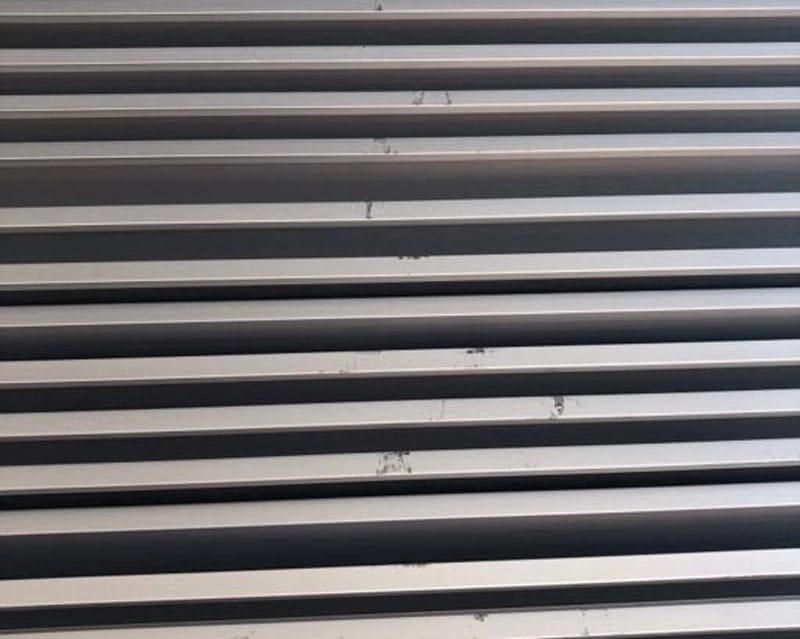
Mill finish refers to aluminum that is left in its natural, untreated state after the extrusion process. It has a dull, matte gray look and may show some surface imperfections like streaks or light scratches. This finish is best suited for industrial applications, hidden installations, or projects where the aluminum will be painted, coated, or otherwise modified. Its affordability and raw aesthetic make it ideal for budget-conscious buyers who prioritize function over form.

In contrast, clear anodized aluminum goes through an electrochemical process that thickens its natural oxide layer, resulting in a smooth, satin silver finish that’s both visually appealing and highly resistant to corrosion and wear. This makes it perfect for retail environments, showrooms, and any space where presentation and longevity matter. The anodized coating won’t chip, peel, or fade over time, making it a low-maintenance and long-lasting solution for high-traffic areas.

Ultimately, your decision comes down to the specific needs of your project. Choose mill finish if you’re customizing the panels, working in a backroom or workshop setting, or want the most economical option. Go with clear anodized if you’re outfitting a space that requires a modern, polished look with added durability. Both options provide the strength and versatility aluminum slatwall is known for—the right finish just depends on how you plan to use it.

Enhance Your Interiors with Monarch Metal’s Snap Panel System: A Seamless Wall Solution

Transform Your Space with Monarch Metal’s Snap Panel System

When it comes to modern interior design, achieving a seamless and sophisticated look is essential. Monarch Metal’s Snap Panel System is a game-changer for architects, designers, and contractors looking for a high-end wall paneling solution. Designed with precision and engineered for durability and built upon our patent-pending MSNAP wall and rail solution, this system allows for hidden fastener installation, ensuring a clean and elegant aesthetic without exposed screws or bolts. Whether for corporate offices, retail spaces, or luxury residential projects, the Snap Panel System delivers both style and performance.

One of the standout features of the Snap Panel System is its easy non-progressive installation process. Unlike traditional wall paneling methods that require complex framing and visible fasteners, this system utilizes a straightforward snap-on mechanism. This reduces installation time and labor costs, making it an excellent choice for projects with tight deadlines. Additionally, the system’s adjustable panel sizing provides flexibility in design, accommodating a variety of wall dimensions and layouts.

Beyond aesthetics, Monarch Metal’s Snap Panel System is built for long-term durability and low maintenance. Made from high-quality clear anodized 6063-T6 Aluminum, it resists wear, impact, and moisture, making it ideal for high-traffic environments. Its concealed fastening method not only enhances the visual appeal but also eliminates dust and grime buildup around hardware, simplifying cleaning and upkeep. This makes it a preferred choice for spaces that require both form and function, such as medical facilities, hotels, and corporate lobbies.

The Snap Panel System consists of wall rails, panel rails, edge trims, reveals, and corner trims, designed to seamlessly integrate with panels supplied by architectural millworkers or other providers. For those seeking a modern, streamlined wall paneling solution, Monarch Metal’s Snap Panel System offers an unbeatable combination of design versatility, efficiency, and durability. Whether you’re renovating an existing space or starting a new build, this innovative system ensures a sleek, polished finish with minimal effort.

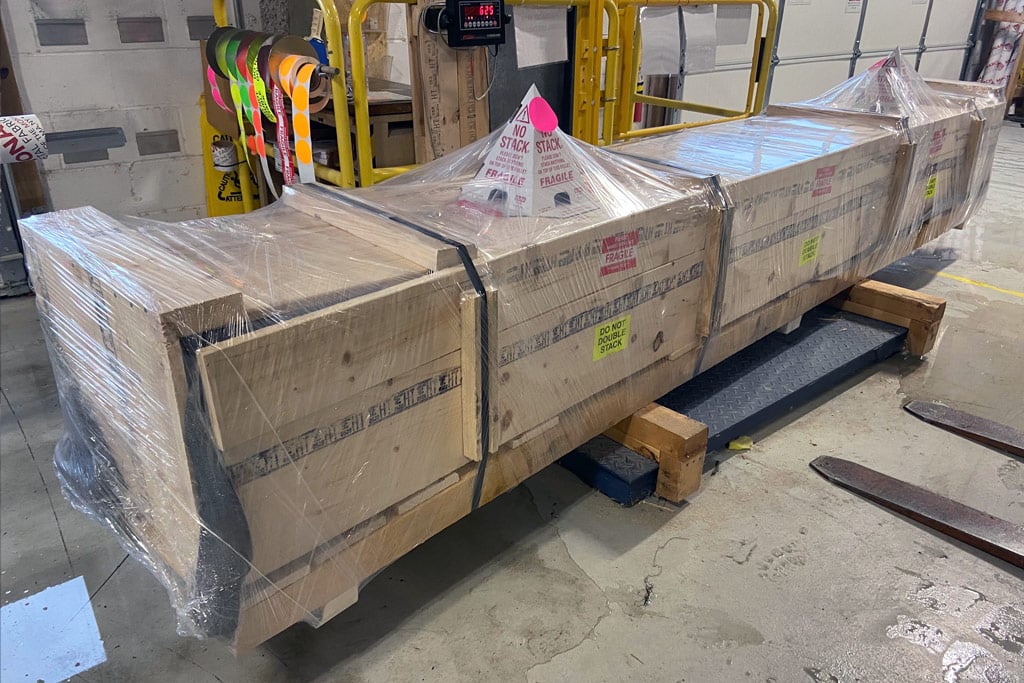
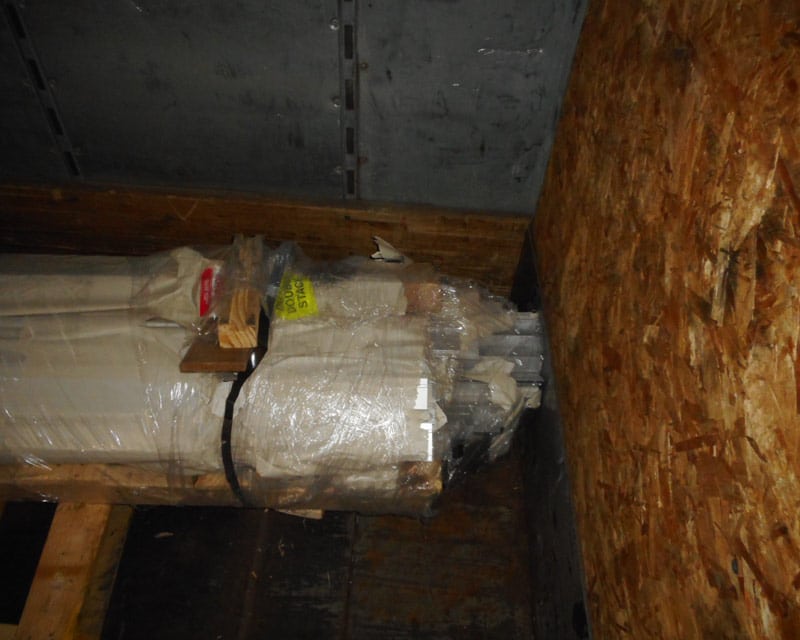
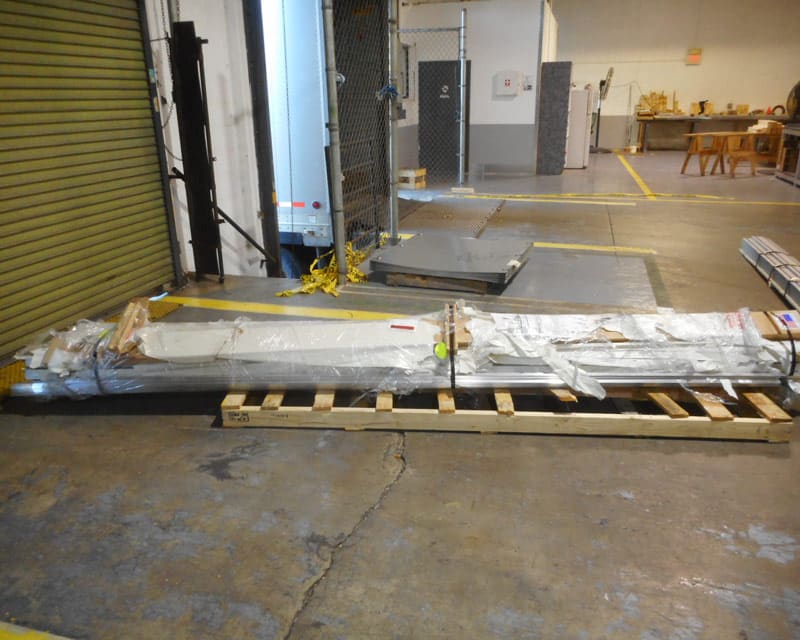
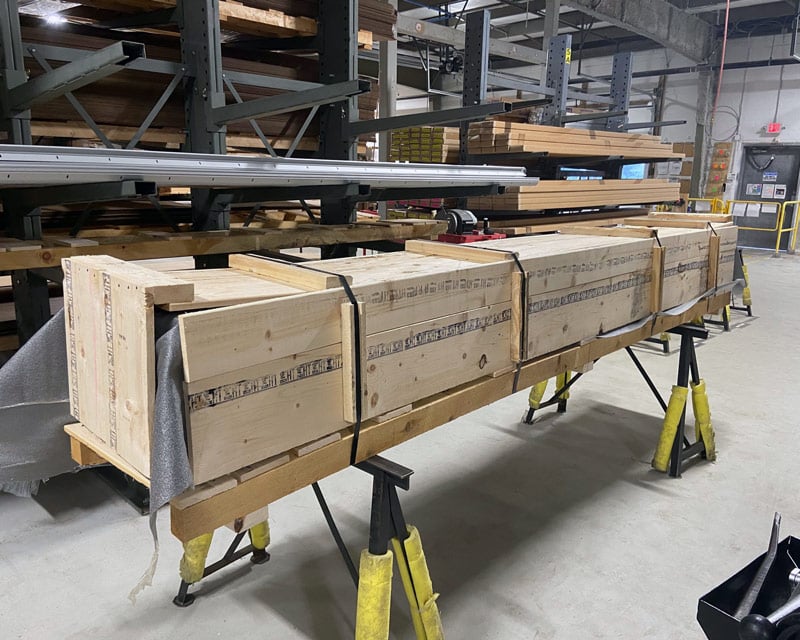
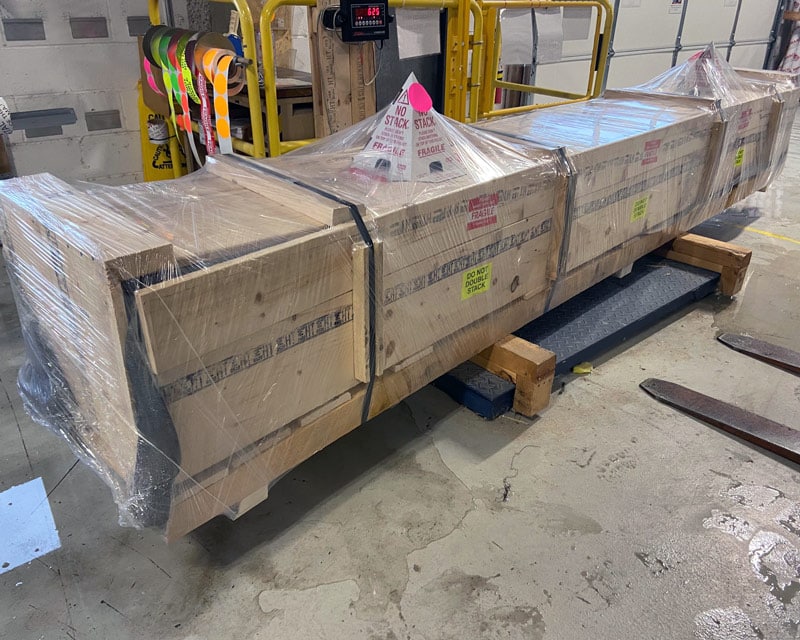
The Importance Of Properly Packaging Orders For Shipping And Transit

Why Packaging Project Orders Properly Is Important

It’s extremely important that customers receive orders on time and in excellent condition. Receiving damaged items can quickly de-rail a project timeline, costing unplanned time and money in the long run. We’ve learned over decades of shipping building materials the stress a damaged shipment can cause. When considering how best to package and ship orders, we take these factors into consideration to help minimize in-transit issues or damage.

Unfortunately freight carriers are beyond our control and LTL companies aren’t always prepared to transport orders properly. Some carriers lack the proper material handling equipment to safely move non-standard size pallets. With orders being moved on and off trucks without consistent material handling this can create shifts within packaging, which is ultimately what causes damage.

Steps We Take To Protect Customer Orders

Internally, we use high quality, premium materials to package your order, so that a customer’s project doesn’t get delayed. Our standard packaging practice helps ensure that our customers receive high quality products, ready to install without requiring touchups.

For our Easy Panel Systems, from the time an order is picked from our warehouse, we perform a complete review to ensure no dings or marks are present. For packaging we try not to touch the reveals and depending on weight, bundle in packs of 3, 6 or 10. Outside corners are wider and bigger (3), edge trims (6) and verticals are a lot smaller (10). We take other shipping precautions for other product types to ensure a smooth and undamaged delivery, including plastic buckets for our Z Clips, tubes, bundles and custom packaging when required.

Using protective sheets between layers, each package is placed on a skid. We create a stable wooden fully enclosed crate that properly protects EPS items. Once the wooden crate is full, we stretch wrap it, apply stickers and no stack cones, while indicating “this side up” and “fragile” to indicate to carriers that extra caution should be used during handling and transport.

Prior to shipping, we take 5 pictures for every customer’s record. These photos serve as documentation for the carriers and claims departments, demonstrating how orders left our warehouse in good condition.

Our Five Pre-Shipping Photographs Include:

  • Invoice
  • Material Before
  • Material Protected
  • Wrapped Skid
  • Pallet On Scale

How Our Standardized Packaging Procedures Work

Since fully crating our EPS product line, we’ve seen a drastic reduction in damage claims, greatly reducing the need to rush replacement products for customers. We like to think freight carriers have the best of intentions in delivering product in the pristine condition it leaves our warehouses. However, there are instances where something happens after product leaves our warehouses that cause irrecoverable damage to a premium product our customer is ready to install. As you can imagine, this causes a hefty delay to the project, and we cannot afford that, and neither can our customers. We have found crating, packaging correctly, and not cutting corners allows for a much more satisfied customer.

Monarch’s New Time, Labor, and Lumber-Saving Trespa Pura System

New for Winter 2021, Monarch Metal is excited to release it’s new support system for Trespa Pura NFC.

Monarch’s new system simplifies the installation of Trespa Pura by eliminating the typical 1x wood furring strips, and EPDM strips, common with typical installation systems.

By eliminating these steps, the MFTP system from Monarch reduces on-site labor, and additional materials, but still creates a ⅞” drained and ventilated cavity behind the cladding. This cavity is required by Trespa, and protects the wall and cladding from trapped moisture.

Installing the cladding with the Monarch system provides a direct labor and material cost savings to the installer. It also avoids the ordering, handling, cutting, and fastening of 1x furring strips. These furring strips can also degrade and hold moisture against the building substrate.

The system begins with Monarch’s ventilated starter rail, MFTPSR, which serves both as a starter rail, and ventilated system closure. It can be used at the head of windows, doors, and other penetrations. The starter rail can be directly applied to the outer face of a quality WRB. A self-adhered or liquid applied WRB is preferable.

Once the starter rail is installed, the first course of cladding is installed onto the starter rail. It has been designed to perfectly match up to the Trespa Pura kerf on the bottom of the cladding. Then, Monarch’s MFTP clip secures the cladding in 16 or 24” O.C intervals. Clips are provided with a .203” diameter thru-hole and designed to use #10 washer-head screws.

To complete the Monarch system for Trespa Pura, are the available Outside Corner, Inside Corner, and Edge Trims. These components have been custom designed for the MFTP clip, and unlike typical trims, do not require furring strips. They are available in a mill finish for finishing in the field, or a black powdercoat for a ready to install option.

The Edge Trim, MFTPET, is an especially useful profile, and can be used all around the building envelope. Uses include window and door trim, vertical transitions, and linear penetrations.

The Outside Corner, MFTPOC, is the best way to turn an outside corner with Trespa Pura. It’s designed to cover the cut ends of the planks, which allows for some forgiveness in slightly uneven cuts.

The Inside Corner, MFTPIC, is also a great way to finish an inside corner. It allows for ventilation through the corner, which can be more susceptible to infiltration.

The Monarch Trespa Pura installation system is approved for use with Trespa Pura NFC cladding, and provides a fast, efficient installation. Look for the new system in Winter 2021!

**Monarch can also provide substructure for installations with continuous exterior insulation. Please contact Monarch for more information on these systems.

Trespa Pura NFC is an innovative, durable, high performance laminate cladding system. It’s known for durability, and a lasting finish that puts other siding to shame. www.pura-nfc.com

Industry Interview with Andrew Morris of Chemical Concepts

In this Industry Interview, Monarch Metal CEO Brandon Bingham speaks with Andrew Morris of Chemical Concepts, www.chemical-concepts.com. They specialize in fasteners, specialty hardware, and adhesives.

Can you please describe your background and what Chemical Concepts does?

What we do is we’re really product assembly people. So whether it’s manufacturers, engineers, anybody putting things together, they come to us when they need solutions. Our core products are adhesives, sealants, tapes, specialty fasteners. So if they’re looking for process improvements or they’re looking to have some kind of better performance in some way or another, or having some kind of engineering challenge that they’re trying to solve, they come to us and we try and you know kind of use our expertise in those areas to put something together for them. So we’re involved in a bunch of different industries, a lot of the collaboration that we do with you guys is in the cladding facade market. It’s a pretty wide gamut, anyone that’s using adhesives or fasteners. So it’s a fun thing we get to kind of do something different every day, you know?

And my background, it is a family business. The answer to part two of your question is I was kind of born into this. So I’m a third generation here. I’m the national sales manager and the company was founded by my great uncle, and the next year is actually going to be the 60-year anniversary. So we’re really excited about that.

When was the deform nut first developed?

So the genesis of this product, we’re the North American master distributor of a company out of Italy called Special Insert. And they’ve developed all these innovative fastening solutions. And they’ve got a really strong R & D department; they’ve got some really smart people that have come up with some really innovative types of fasteners. And we just saw them as really a great fit for us in terms of what we were doing with adhesives and sealants, and through them is really what we’ve kind of branched out into these specialty fasteners.

Because you know for a long time we kind of competed against fastening you know, kind of in a big conceptual sense. You know it’s like well don’t use a fastener, use an adhesive. But we found so many applications where people were looking for an adhesive in conjunction with a fastener, or a fastener in conjunction with an adhesive. Or it was looking to help for the best way for people to put X together, you know? So sometimes the right answer is a fastener. So they developed the deform nut, it’s a patented system. The fastener is approximately five years old.

Can you describe the deform nut for us? How it’s different from other construction anchors that are available? Is there only one specific use for it? What are those uses?

Well, it’s a specialty type of rivet nut. And if you’re familiar with rivet nuts you can go ahead and Google them, The deform nut is the kind of rivet nut technology that has been around for a long time. They’re kind of neat fasteners; they kind of act like a rivet but give you a female mechanical anchor. Special Insert has sold standard rivet nuts, standard deform nuts for probably 30 plus years, I know their company goes back three generations too.

The problem they were trying to solve was anchoring into hollow core materials. So that could be honeycomb sandwich panels, which is primarily what you and I have been working on. It could be other kinds of composite sandwich panels. But you know there’s a lot of solutions that exist for solid materials, if it’s sheet goods, sheet metals, but with these new composites that have been out there, and I use the word new, I mean they’ve been using these things in aerospace for 30 or 40 years, but it’s still these composites are always evolving. And it’s just been a challenge, how do you have us create a secure connection into a solid core, into a hollow core material?

That’s the problem the deform nut solves. So it’s a two-step fastener basically. So the part one component of it is a deformed nut where you drill a hole into the panel, the deform nut is inserted using a rivet tool kind-of machine. It crimps or deforms the back side, once it’s inserted. The backside is deformed around the skin of the panel so that it’s kind of crimped between the face of the rivet and the part that’s just been deformed around it. That gives you a secure connection to the face, but the face of the panel is not really the structural component of a honeycomb panel, if we’re talking about honeycomb panels. Actually the honeycomb core itself is really the structural component.

That gives you kind of a starting point. Then using a structural adhesive is injected into the hole and then a secondary screw, they call the grub screw is inserted while the adhesive is still wet. And when the whole thing is said and done, you have an adhesive connection to the back face, you have a rivet connection to the front face, and then that grub screw is placed into the whole center, so you have a structural bond to the surrounding honeycomb cells. So you basically are connecting to all three components of the deform nut to the honeycomb panel. And once that structural adhesive cures, you’ve got a really strong connection. You and I have seen on some of the projects we’ve worked with, we’ve had to do pull testing for some of the exterior building facades, they required pull testing on the systems and it is strong. I’m trying to remember off the top of my head some of the values, but I believe we’re in the one or two thousand pounds.

They are in the two thousand pound range in terms of sheer, I think in a similar range in terms of tensile. And you know when we were doing the shear pulls, I mean we were shearing the bolts off, which is certainly what we like to see.

And your other part of your question was how it is different?  I’m not aware of anything exactly quite like it. There are anchors that just require you to put a female insert into the honeycomb in some competitive systems out there. There’s a lot of challenges associated with that, where you have to be very careful, you have to be careful how you position things, there’s nothing holding the female anchor kind in place while the adhesive cures. So there’s a lot that can kind of go wrong in that scenario. And then you’re really just relying on the adhesive only where you know a lot of people like the fact that this is kind of a combination, mechanical and adhesive connection. And what happens is that even when the adhesive cures, a lot of engineers get scared about adhesives. Which you know having an adhesive background, you know I get a little sensitive to that but because I know what these adhesives can do, but still when that adhesive cures, you end up with like a mass of adhesive that’s bigger than the hole that you drilled. So that’s really mechanical too. Once that’s a solid mass, it can’t come out unless you pull the whole panel apart.

The other types of systems that I’ve seen, basically involve putting an anchor in place while you’re manufacturing the panel. So you have your sheet metal, you put your honeycomb core on top, then you put an anchor in, and then you lay the skin on top with the adhesive and put it in your press. And so it’s kind of baked into the panel. So that’s a good solution, I mean they work well, they’re strong, they’re inexpensive, but when we get on projects they don’t always have the luxury of knowing where the anchor points are going to be when the panel’s manufactured, and we work with a lot of people that do basically secondary operations where they’re buying panels that are already manufactured and cutting them down and then gluing some kind of material to the face. So if they want to have a stone facade on a building with a honeycomb backer, or a porcelain facade with a honeycomb backer or some other kind of material, it’s usually not what you would say the “OEM” of the panel that’s really involved in doing the work. So they don’t have the opportunity to put in the anchors when the composite panel is manufactured. They only want to put in the anchors after their new decorative skin is laminated on. I guess a little of the landscape of what we’re competing against and how we’re a little bit different.

You briefly mentioned the special tools needed, but what specifically do you need? And do they get that from you as well?

To install the anchor itself you know you need the anchors, and the anchors are two parts like I mentioned. There’s the deformed nut and then the grub screws, so when you buy a set it comes like that. You’ll need a drill bit of the right size; it’s a 13 millimeter drill bit. And we usually recommend what they call an end mill cutter. So instead of just like a regular drill bit, like what they call jobber bits or that you would find at the hardware store, this kind of drill is a flat bottomed hole. This is important so that you make sure you’re clearing out all of the material, if you want to drill through the honeycomb to clear out the aluminum shavings, that would be in the middle of the honeycomb. You want to take off that layer of cured epoxy from the bottom of the reverse side of the panel. So, that you’re giving a nice clean surface for the adhesive to grab onto. So it’s important to have, it’s like a four fluted end mill cutter is what they’re called. We do sell those bits and you can get them on Amazon and other places where, once we give you the specifications, but we also sell the bits.

https://www.youtube.com/watch?v=OpyzQFdZ99E
Installation Video

Then you just need some kind of rivet tool. There are manual and pneumatic tools. If you’re doing a small project the manual tools work fine, they’re relatively inexpensive. I think they are a hundred dollars or less for one of those. We sell them and there’s other kind of rivet tools available, rivet technology has kind of been around for a long time. We are not the exclusive source for that kind of machinery so you have flexibility in terms of getting the equipment. We are not out here to own you in terms of all the equipment; we just want to again help you out with your projects.

And then with the pneumatics, if you’re really doing a lot of stuff that we’re targeting in facades of relatively large commercial buildings; where there could be many hundreds or even thousands of individual panels. And each panel might have eight or ten fasteners, so depending on the sizes of the panels we could be talking tens of thousands of fasteners. In those cases you know the pneumatic machines definitely make sense. We’ve got a good video demonstrating the pneumatic tool, where you see it inserts the tool, crimps it, and then unthreads itself in like one pull of the trigger, so it’s a huge time saver. Those tools are relatively expensive but they’re certainly worth it in terms of man hours, it’s always the biggest concern that everybody has. So when you put this whole thing together maybe you get a link to that video or something so.

I know people are visual out there so maybe we’ll put a picture or whatever we can do to illustrate that. The last thing you need is adhesive. We sell the adhesive that goes along with it. And then those come in, again depending on the scale of the job, you might need a small cartridge of adhesive or big ones if you’re doing really a lot of these. And then what we sell is a two-part structural acrylic adhesive that fits in a little cartridge gun. You know maybe you’ve seen these kinds of systems where it’s a two-part system? That it’s like a double-barrel caulking gun kind-of-thing if you can imagine that. We sell the dispensers for that as well. That’s basically all you would need.

And then you’re going to connect that presumably to a hanging system like Monarch Metal provides for honeycomb sandwich panels. Then you would just need a bolt to connect the two systems and we could certainly help you source the bolts that meet your requirements for the thickness of the honeycomb that you’re using.

Can you give a brief statement on why people are using honeycomb panels? And how that deform nut, and the deform nut rail that we made to manufacture and sell, helps them?

It is a pretty cool technology. Most of these honeycomb panels have an aluminum core. If you look at it you see all these little kind of hexagonal cells of honeycomb of aluminum. When you have a front skin and a back skin, and that kind of honeycomb matrix of aluminum in the middle, that has a lot of air in it, you end up with a very lightweight panel, that’s also very rigid. That combination of lightweight and rigidity really solves a lot of problems that engineers are looking for. That’s the reason these kinds of materials are used in aerospace, they’re used in rail, and in transportation. We sell deformed nuts for those applications where they’re trying to attach chairs to a honeycomb floor of a train, and they want to figure out a way to attach the seating to that. In terms of facades you’re seeing, my understanding again my background is adhesives and fasteners and I’ve learned a lot about these industries from participating in it but I do not want to pretend to be an expert in facades. But a lot of my understanding is that a lot of these designs are kind of things that are going on in Europe where you’re seeing a lot of more of these ventilated facade designs coming over. There are a lot of environmental benefits to those and people love the look from an architectural design standpoint. People love the look of natural stone, it’s a natural product and is sustainable. You know sustainability is another kind of trend that this touches on where in the US we have Leed points and all these kinds of things where government programs are incentivizing companies to build green. Green building is on the mind of a lot of architectural professionals. Even without the government, there are people and private companies who want to stake their claim out there that they’re doing the right thing for the environment and rightly so.

There are a lot of technical challenges that come with natural stone. It’s beautiful and as good for the environment as it is compared to other building materials. If you want to get a three centimeter thick piece of granite and put it 20 stories up on a building you can imagine, or even 100 stories or whatever it is, you could imagine the kinds of engineering challenges that it poses. People want that look of natural stone, but they want the light weight, they want ease of installation. The end users want it, the engineers want it, and the installers want it. It saves everybody a lot of time and money throughout the process from install, to while it’s in use, to engineering etc. Rather than just cutting stone to size, you have to cut the stone very thin and you have to laminate it to the honeycomb panel. So there’s a bit more work on the back end but it saves a lot of work from every stage from that point on. The big driving factors are the need for lightweight, the environmental friendliness, and the logistical challenges too; those are kind of what we see driving everything.

What’s the biggest misconception that you deal with on the deform nut when people come to you saying “hey Andrew I want to use this” and they may have something wrong?

I it’s a very niche product as it caters to a very specific application. If you’ve never come across us before, it’s also a European product that’s relatively new to North America. I think awareness is probably the biggest thing that we face which is why we talk to people and they say someone told me to call you or I’m not sure what to do, I found this online or this is what we’re trying to do, we don’t know how to do it. It’s really just explaining the entire system from the beginning to them. Once they come to us and we kind of walk them through what they have to do I think we’re probably able to manage most of the unknowns from the beginning of the process. It’s just a matter of understanding the alternatives, how this compares to the alternatives, and just trying to figure out what’s the best fit for them and what we’re trying to do. If you have a honeycomb panel you want to anchor there’s very few existing systems that are just ready to go and have clear instructions.

Is there any other testing that has been performed on the deform nut or are those just the two main ones and?

In the US as opposed to the EU from my understanding, it is kind of a patchwork in terms of regulatory and testing of what’s required. There’s not really one distinct body such as ICC in Europe. They’ve done a good job in the EU in terms of making things very simple from the liability standpoint, very simple from a market approach standpoint. The cost is very expensive to do the certification but once the product is certified the liability is limited. The certification says this product was tested, that liability isn’t on the manufacturer anymore. Where they use the tested product they’ve done their due diligence and that’s basically a stamp of approval there. There’s not really an equivalent to that in my understanding here in the US. If you’re in Miami they have the Miami-Dade NOAs where they want to make sure it’s hurricane resistant. You go to California there’s special earthquake resistance requirements, there’s a lot of local things. There are ASTM tests, but the tests aren’t quite certifications. The liability is still on the engineer to basically put their signature on that and say we approve that we’ve done our due diligence and we’re accepting that.

We have done ASTM tests, we’ve done tensile, we’ve done shear. There have been some mockups that have been made for testing. There’s been some projectile testing for Miami-Dade NOAs. I’m still kind of waiting on the status of that, but I’ve seen some of the videos and what they do is they have a two by four cannon and they shoot a two by four at a mock-up. So far we’ve met every expectation in terms of what kind of testing we’ve thrown at it and I’m sure there’s going to be more stuff that people are going to throw at us in the future.

I always like to ask where people like you see the facade industry in the United States going in the future. Are you too new to answer that question or are you starting to get a feeling?

That goes back to my earlier where we are definitely seeing more of a focus on these ventilated facades. The green building trend in terms of that being more important to companies and that’s kind of a push-pull thing. You see the regulations are pushing and then the companies want to do more, they want to showcase their credentials in terms of how green they are, and show their commitment to sustainability. I am not an expert on this but I believe there’s been some legislation recently in New York that really put a lot of people in the building industry into a tailspin. This is what people are telling me at least, in terms of the thermal ratings on these buildings, you know you got all these glass buildings and they said they kind of laid the gauntlet down saying let’s improve R values. All buildings in New York City or new construction must meet the standard. From what I understand, that’s going to really drive demand for alternatives, you’re not going to see these glass buildings. You’re going to see a little bit more diversity in terms different cladding materials such as honeycomb panels that are thermally isolated.

https://www.monarchmetal.com/products/cladding-rain-screen-systems/wall-brackets-substructure-components/wall-bracket-vertical-rails/

It’s difficult to achieve that kind of thermal insulation with glass. Light goes in, it’s very susceptible for warming and cooling from the sun, you lose a lot of thermal energy. Having that air gap of a ventilated facade where you have that column of air in between really does a whole lot in terms of helping to better insulate. You basically turn a skyscraper to a giant thermos with glass construction.

I think regulation is going to keep driving things forward. I think companies are going to keep driving things forward and I think design is going to keep driving things forward. There are great architects doing really beautiful things, and I think people are always going to want nice looking buildings. There is this competitiveness in the industry for design and performance.

Installing Monarch Z Clips: What Do I Need to Know About Mounting to Drywall/Gypsum?

_SJS3051

We frequently receive customer inquiries about whether Monarch Z Clips can be mounted to drywall and which fasteners to use when doing so.

In a nutshell, yes, you can mount the continuous lengths to drywall. However, it’s important to remember that the strength of the Monarch Z Clip Hanging Systems derives from the material you are mounting to and the fastener that you select. If you were to mount the continuous lengths with regular sheet metal screws and not penetrate any studs, it is very likely the system would fail with any amount of shear load.